|
1. If you haven't already registered with pdf-it please do so first by clicking here.
If you need help registering you may visit our Register FAQ's by clicking here.
|
|
|
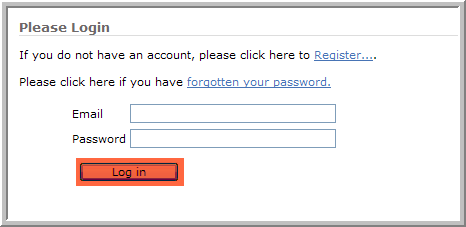
2. Login to Reporting Solutions' pdf-it by clicking here. Type in your login information
and select the Login button.
|
|
|
|
|
|
3. Select Create a pdf-it or click on the picture.
|
|
|

|
|
|
4. Select the Browse button
|
|
|

|
|
|
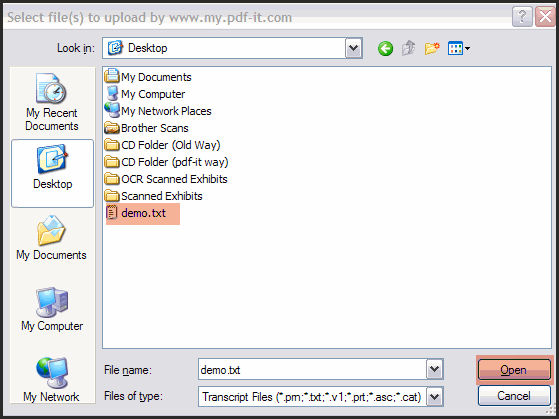
5. Find your ASCII file and select it. Then select the Open button.
|
|
|
|
|
|
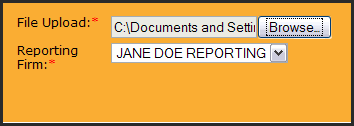
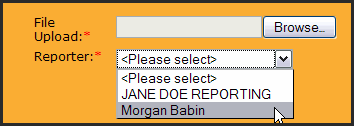
6. Reporters will be able to select the reporting firm or Firms will select the appropiate reporter. For firms, if the reporter is not listed, they can select their own firm. Select the Next button.
|
|
|
|
|
|
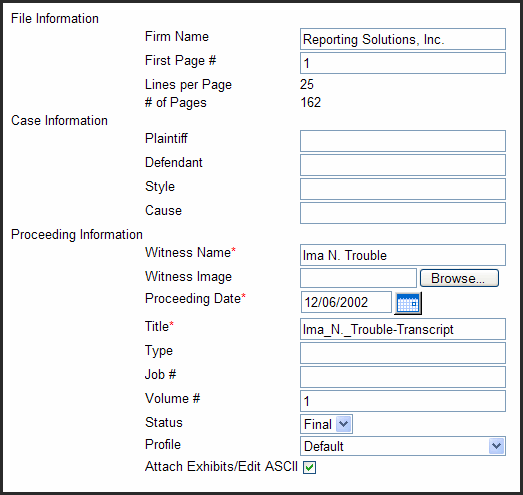
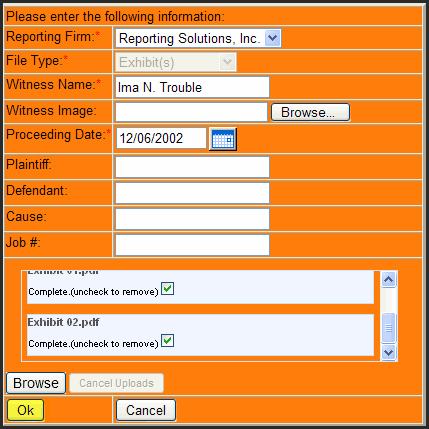
7. The first page number, lines per page, and number of pages detected
will be presented. Changing the lines per page or total pages is not
possible. Only repagination is available by changing the first page number. Type in all required information as notated by the asterisks.
Some information may have been found from the ASCII and auto-populated to save time
and increase accuracy. An optional image of the witness can be attached. If
the firm has more than one profile an option to change it will be present. If exhibit
file(s) have already been scanned, check the box Attach
Exhibits/Edit ASCII; otherwise, select the Next button.
|
|
|
|
|
|
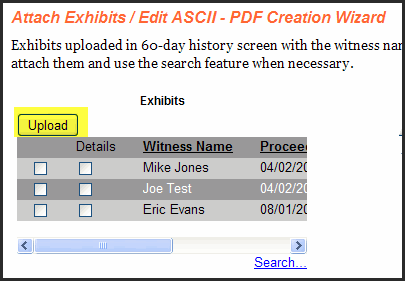
8. If Attach Exhibits/Edit ASCII was chosen in the previous step and the
exhibit haven't been previously uploaded, select the
Upload button
|
|
|
|
|
|
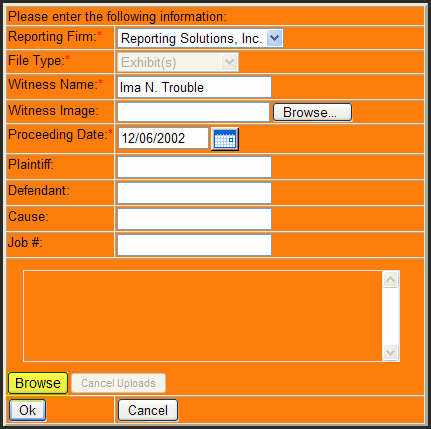
9. Select the Browse button at the bottom
|
|
|
|
|
|
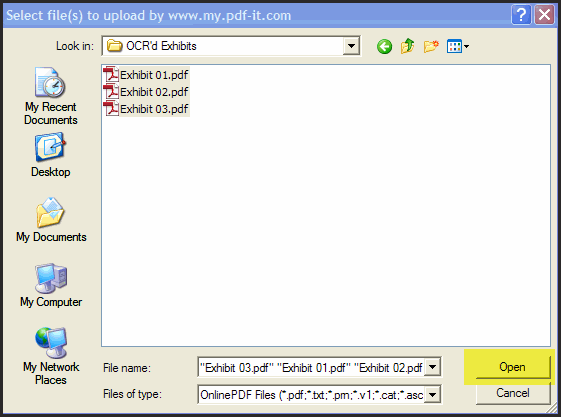
10. Select the first exhibit file, hold the shift key, and select the last exhibit.
Select the Open button.
If all the exhibit files are in the same folder with no other unwanted
files the ctrl + a can be used to select all the files.
|
|
|
|
|
|
11. Once all the exhibit files have been uploaded select the OK button
|
|
|
|
|
|
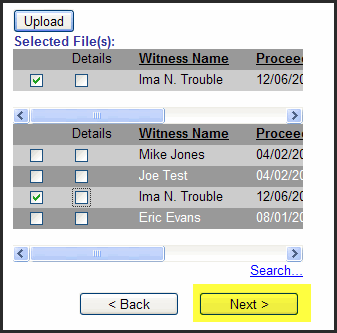
12. The uploaded exhibits should be checked and select the Next button
|
|
|
|
|
|
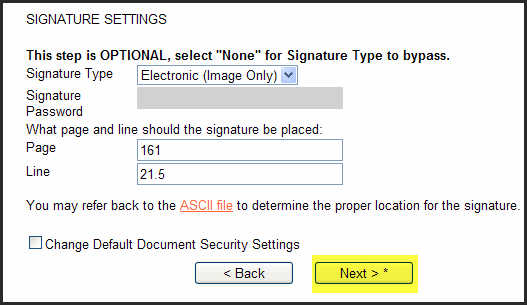
13. The signature type will default to the firm's preferred signature. A
signature password is only needed when a signature type of "Digital & Image" is
chosen. Select
the Next button.
|
|
|
|
|
|
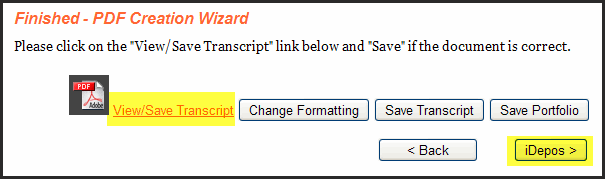
14. Select View/Save Transcript to check for accuracy. Use the Change Formatting button to make adjustments
to headers/footers, etc.. Select the iDepos button to send to client(s)
|
|
|
|
|
|
End of instructions.
|
|
| |
|
|